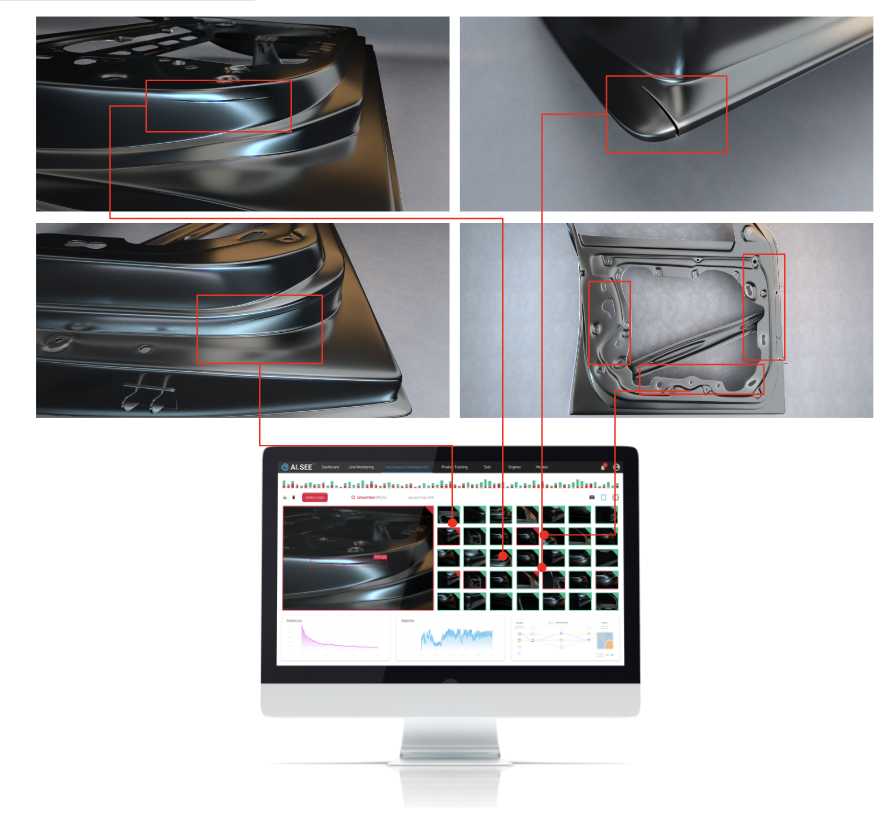
In times when product quality is becoming increasingly important, producers are expected to produce flawless goods. Procedures for seamless quality management are therefore essential in every industry. Automated inspection systems offer the opportunity to make quality inspection processes more efficient. Surfaces in particular, such as those of metal and plastic components, must be both aesthetically and functionally flawless. Only if components are produced flawlessly can the finished product be classified as high quality.
Even the smallest defects in the surface, such as scratches, pores, dents, blowholes or impact marks, can therefore lead to expensive complaints, safety defects, functional losses and even functional failures. If these are only detected later in the production process, they can result in high costs. Complex geometric or safety- or function-critical components must also be reliably manufactured to a consistently high quality in order to ensure that the company's reputation is not damaged.

Fault-free products thanks to surface inspection
Surface inspection is a proven method for ensuring product quality. As the name suggests, this process involves inspecting the surfaces of materials or products for anomalies or defects. The term surface inspection covers various methods that differ in terms of their measurement technology, speed and reliability, among other things.
ON TREND
Machine learning for the automated quality inspection of surfaces
The use of automatic optical inspection of surfaces significantly increases efficiency and consistency in the industry. Due to large existing and increasing amounts of data, it is possible to detect precise defects using image processing. The advantages of automated surface inspection lie in the use of machine learning algorithms to optimize speed and accuracy. This optical inspection thus qualifies as an in-line solution for function- and safety-critical production chains from components to industrial finished products.
The enhancement of the company's reputation by increasing the quality of material testing is possible by connecting to existing structures without the need for a major new installation in the production chain. Defects on the surface of various materials, such as metals like aluminum, plastics or carbon, can be reliably detected in this way. In addition, the optical inspection can take place in-line within the production chain, thus speeding up inspection times while increasing quality at the same time. Furthermore, a recorded check of each component can be guaranteed in order to avoid safety gaps and reduce both committee and downtime. Anomalies within the production chain can be detected at an early stage thanks to real-time monitoring, thus avoiding possible production errors.

Find out if AI can automate your quality inspection
EXCURSE
Conventional methods for the optical inspection of surfaces
For an optimized production flow, reliability, consistency and objectivity are key factors that influence the quality of production alongside susceptibility to errors, costs and speed. Some production facilities continue to rely on the use of trained employees in this step of quality assurance. However, human visual quality assurance is error-prone, expensive and often too slow for the production flow. In addition, fluctuations in concentration and personal condition are significant disruptive factors and lead to avoidable quality losses and even safety and functional defects in the products.
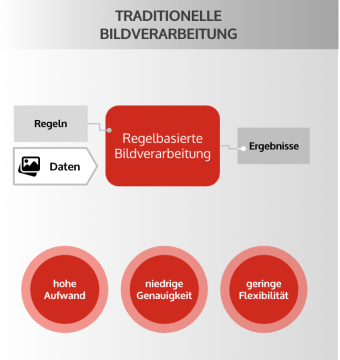
On the other hand, rule-based computer vision systems cannot scale efficiently due to the large number of surface structures and the variety of defect patterns. Although the measurement technology of these systems is computer-aided and the management of production quality is digital, inspection using computer vision systems lacks the necessary flexibility to reliably inspect different surfaces.
Furthermore, very short cycle times also pose a challenge for automated optical systems for surface inspection. Suitable evaluation software is crucial here in order to obtain efficiently usable results.


Get to know the integration possibilities of AI.SEE™ for your production
Lernen Sie Integrationen
von AI.SEE™ für Ihre Produktion kennen
Discover now
Material-independent surface inspection thanks to AI
Thanks to Ki-based image processing, automated surface inspection is the key to functionality and aesthetics - completely independent of the materials to be inspected. Nevertheless, different materials pose different challenges in quality control. For example, the automated surface inspection of wooden surfaces differs significantly from the automated quality inspection of carbon components. Despite differentiated requirements, the automated inspection of surfaces is suitable for all materials thanks to the AI used. Whether thin sections on a plastic component, casting defects on aluminum components, cracks in carbon fibers, unevenness on a wooden surface or cavities in a metal workpiece - the algorithms of the artificial intelligence used make it possible to inspect any material for the quality of its surface. Automated optical inspection thus proves to be the optimal solution for any material in production.
Take your surface inspection to the next level with AI.SEE™ from elunic. Whether wood, plastic, aluminum, carbon or other metals. Optical quality inspection - material-independent and safe!
Find out more about the use case.


